Your Switch 2 can look much sharper on a big screen than on its own 7.9-inch display, but only if the dock, power and HDMI cable are hooked up the right way. This guide shows how to connect Switch 2 to TV in nine short steps, which cables you must use, how to pick the right HDMI input, and what to do if the picture never shows up.
Want to see it done first? This short video walks through the same setup:
Connect a Nintendo Switch 2 to a TV – EASY Step by Step Instructions
Nintendo lists four things for TV mode. Check that you have all of them before you plug anything in.
Your Nintendo Switch 2 console
The Nintendo Switch 2 dock
The Nintendo Switch 2 AC adapter (model NGN-01)
An Ultra High Speed HDMI cable, such as the one included with Switch 2
Two older Switch parts will not work here. The HDMI cable that came with the original Switch is not Ultra High Speed, so it cannot be used to play Switch 2 in TV mode. The original Switch AC adapter also has a different power output, so it cannot power the Switch 2 dock for TV mode. If you are upgrading, use the cable and adapter from the Switch 2 box. If you are shopping for extras, our guide to the best Switch 2 docks covers alternatives.
How to Connect Switch 2 to TV in 9 Steps
These steps follow Nintendo’s official TV mode setup. The first four connect the dock, and the rest dock the console and set the TV.
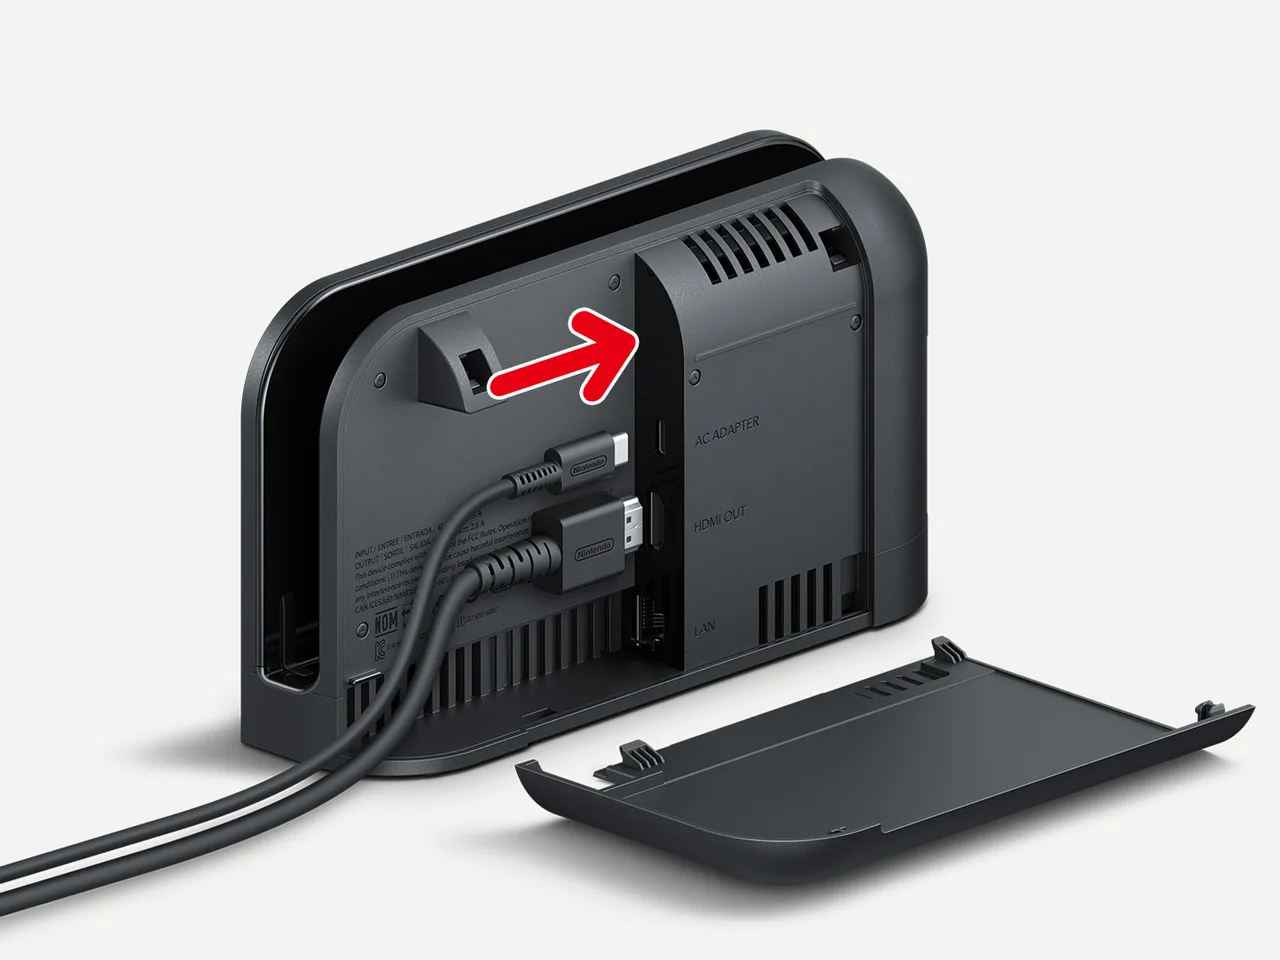
Open the back cover of the Switch 2 dock.
Plug the USB-C cable from the Switch 2 AC adapter into the top port on the dock (the one marked AC ADAPTER).
Plug the AC adapter directly into a wall outlet. TV mode draws a lot of power, so skip the power strip.
Plug one end of the Ultra High Speed HDMI cable into the HDMI OUT port on the dock.
The AC adapter cable goes in the top port and the HDMI cable in the middle port, then the cover closes (Image: Nintendo)
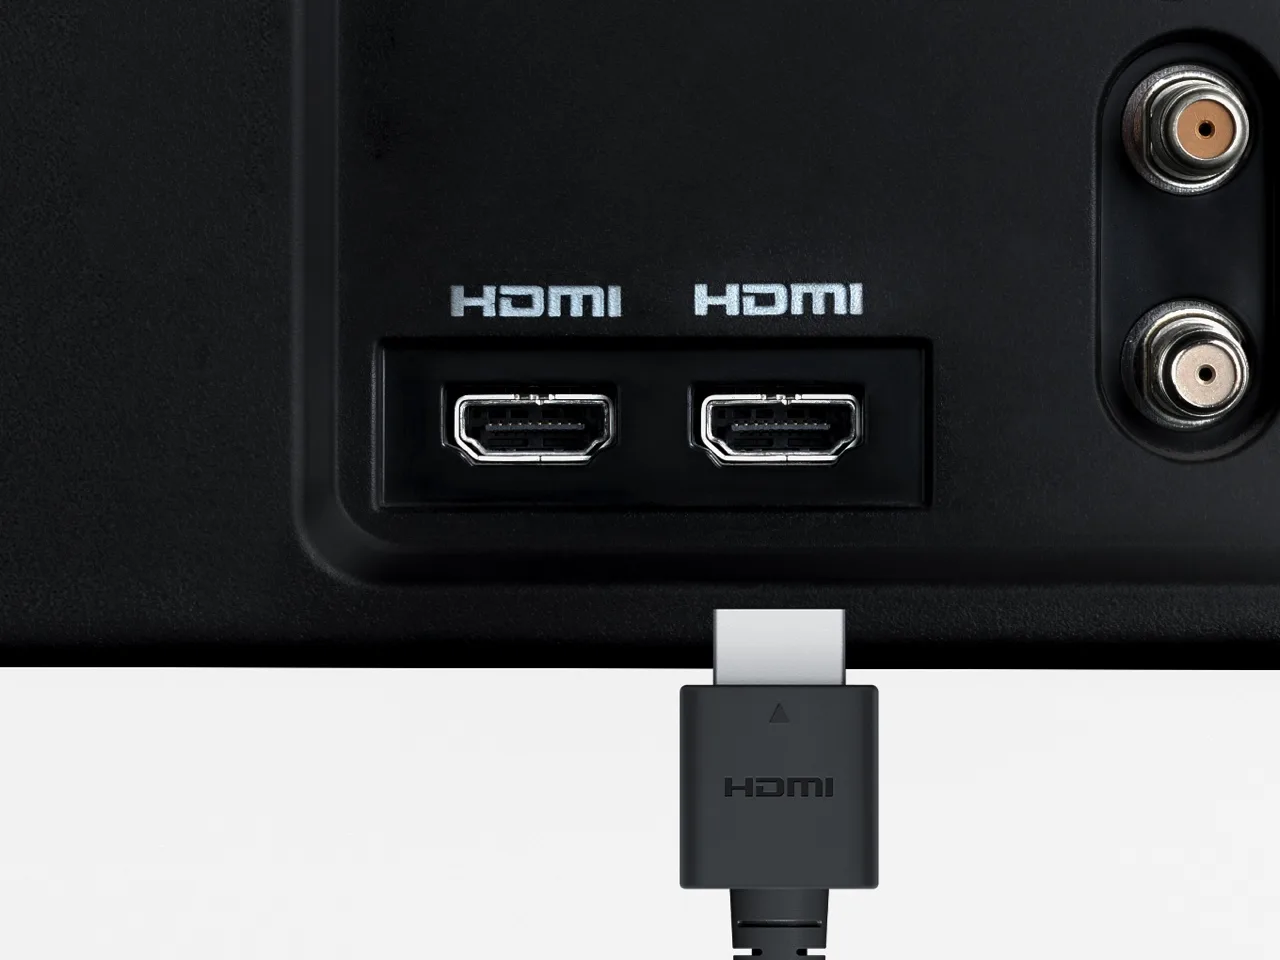
Plug the other end of the HDMI cable into an HDMI port on your TV or monitor. Connect it straight to the TV rather than through an HDMI selector, and note the port number.
Use any free HDMI port and remember its number (Image: Nintendo)
Close the back cover of the dock.
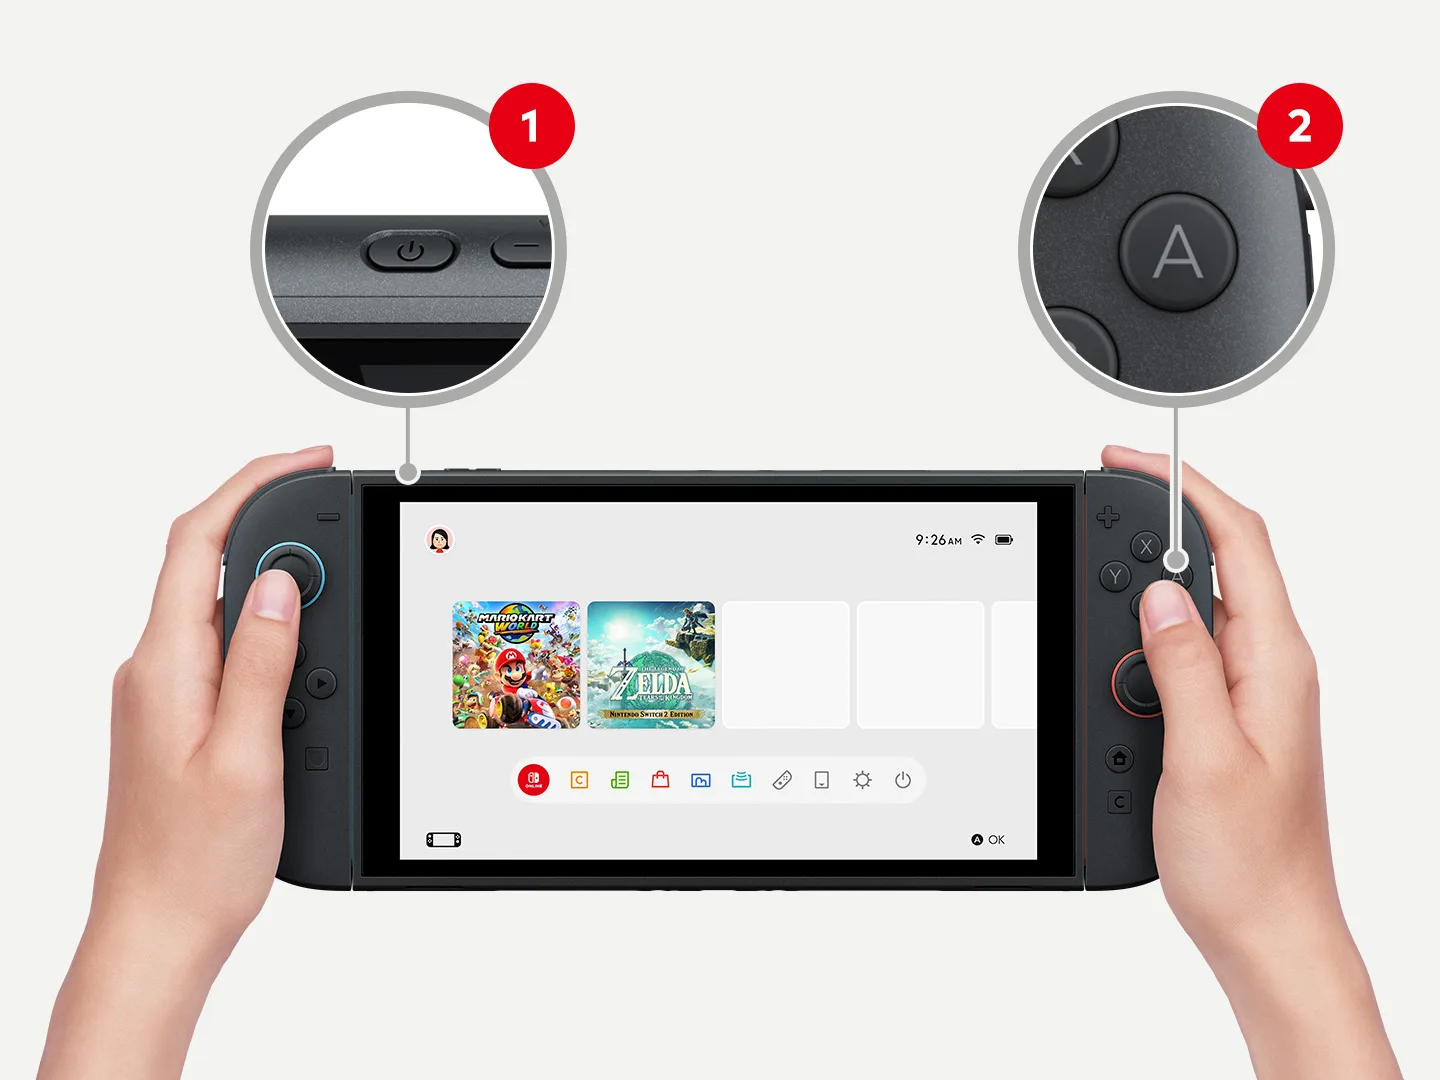
Press the POWER Button on the console, then press the A Button to reach the HOME Menu.
Turn the console on and press A to get to the HOME Menu (Image: Nintendo)
Detach both Joy-Con 2 controllers. Hold one side of the console, press the release button on the back of the Joy-Con 2 on the opposite side, and pull outward. If you dock the console with the Joy-Con 2 still attached, you cannot use them to play. If you plan to use a Switch 2 Pro Controller or another controller, you can leave them on.
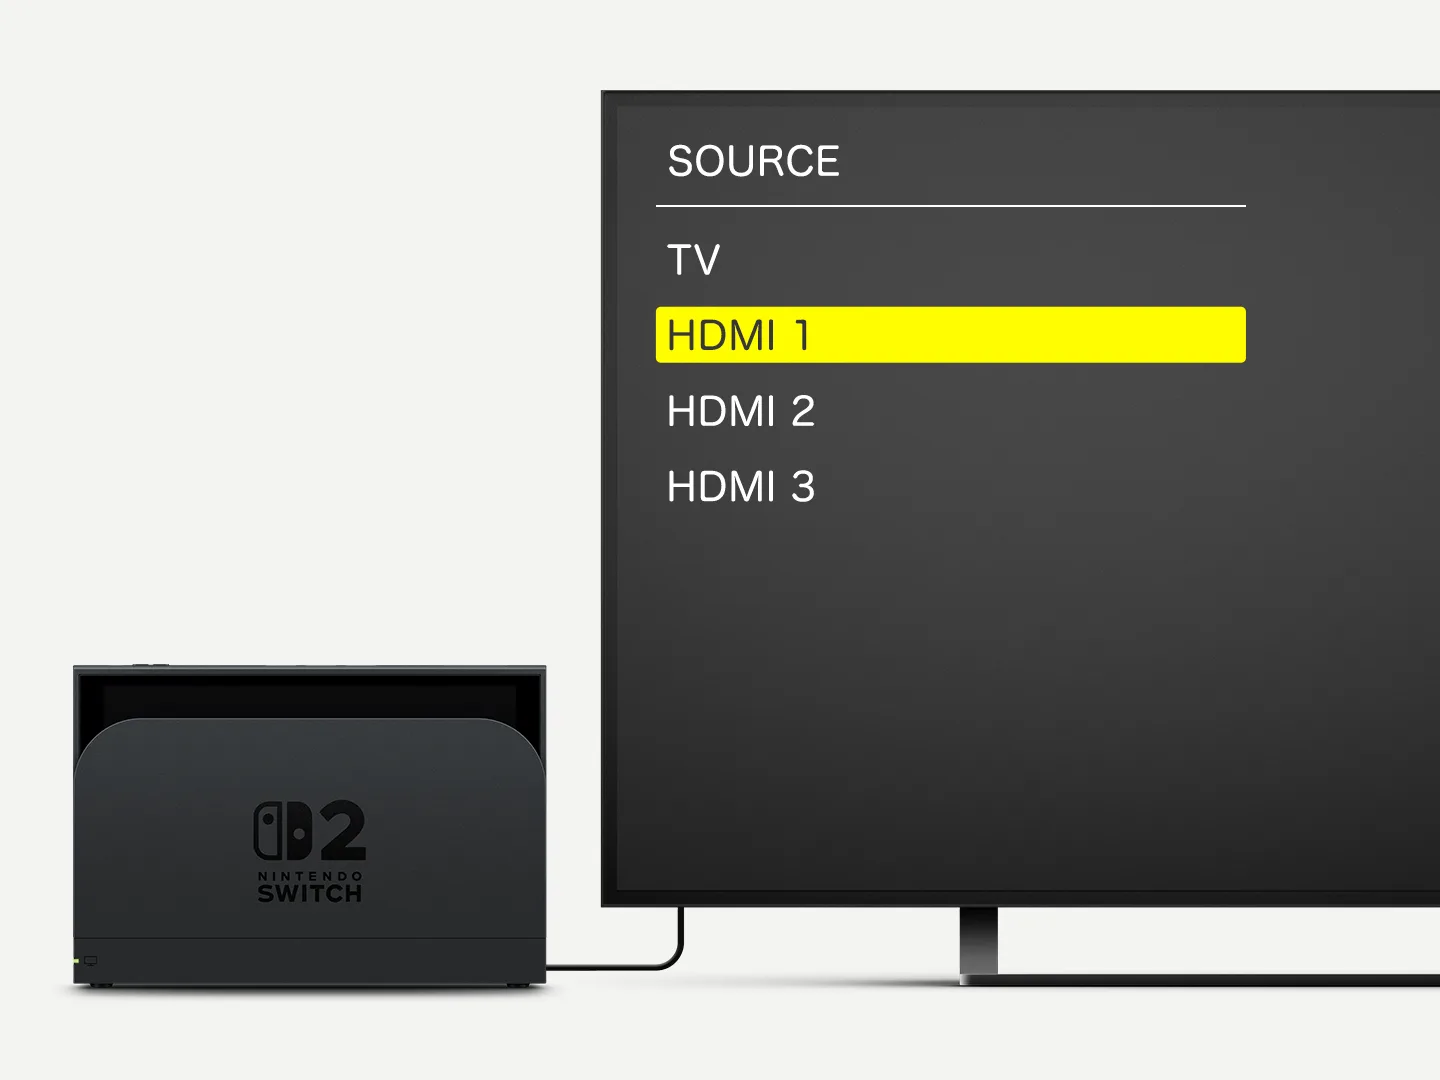
Lower the console into the center of the dock from above, with the screen facing the same way as the dock’s front panel. The console screen turns off, and the TV output LED on the dock lights up. Then turn on your TV and switch it to the HDMI input you used.
Pick the HDMI input that matches the port you used (Image: Nintendo)
When the Switch 2 screen appears on the TV, you are done. If the Joy-Con 2 have never been used with this console as separate controllers, pair them first, since they must be paired to work wirelessly.
Which HDMI Port Should You Use for Switch 2?
Any working HDMI port gets a picture, so HDMI 1 or HDMI 2 both work. The difference is in the port’s standard. The Switch 2 outputs 4K at up to 60 fps, or 1080p and 1440p at up to 120 fps, and a 4K60 signal needs an HDMI 2.0 port. Most 4K TVs from the last several years have one, while an older HDMI 1.4 port may cap 4K at 30Hz. Look for labels such as 4K60 or 4K120 near the ports, and pick one of those if your TV has them.
Best Switch 2 Display Settings for Your TV
The console usually picks the right output on its own, but you can confirm it. From the HOME Menu, open System Settings, then Display.
Dock Output Information: shows what the dock is sending to the TV, including the resolution and whether HDR is on.
TV Resolution: leave it on Automatic, or choose 2160p (4K) to force 4K. If the screen goes black and stays black, recheck the cable and port.
HDR Output: set it to For All Software or Compatible Software Only. If the picture looks dim or washed out on your TV, set it to Off.
4K, HDR and VRR only work in games that support them and need a compatible TV.
Can You Connect Switch 2 to a TV Without the Dock?
Not in Nintendo’s setup. Every official step runs through the Switch 2 dock, and the dock is also what sends the video to the TV. Third-party docks and USB-C to HDMI adapters exist, but they are not part of Nintendo’s instructions, and compatibility can change after a system update. If you want a backup, buy a dock that lists Switch 2 support and keep the official one as your fallback. Nintendo’s instructions also only cover a wired HDMI connection, with no wireless option for sending the picture to a TV.
Switch 2 Not Showing on TV? Quick Fixes
If the TV stays blank after you dock the console, work through these in order.
Unplug every cable from the dock and plug them all back in firmly.
Choose the correct HDMI input on the TV, or try a different HDMI port.
Try another Ultra High Speed HDMI cable if you have one.
Restart the console: hold the POWER Button for 3 seconds, then choose Power Options, then Restart.
Remove anything between the dock and the TV, such as an HDMI selector.
Check that you are using the Switch 2 AC adapter (NGN-01) and an Ultra High Speed cable. Nintendo says an underpowered adapter can trigger the message “Could not connect to the TV.”
Make sure the vents on the console and dock are clear and that both sit in an open, ventilated spot.
If the problem continues after all of that, Nintendo suggests contacting its service center, since the console, dock, cable or adapter may need repair.
How to Stop the Console From Waking When You Undock It
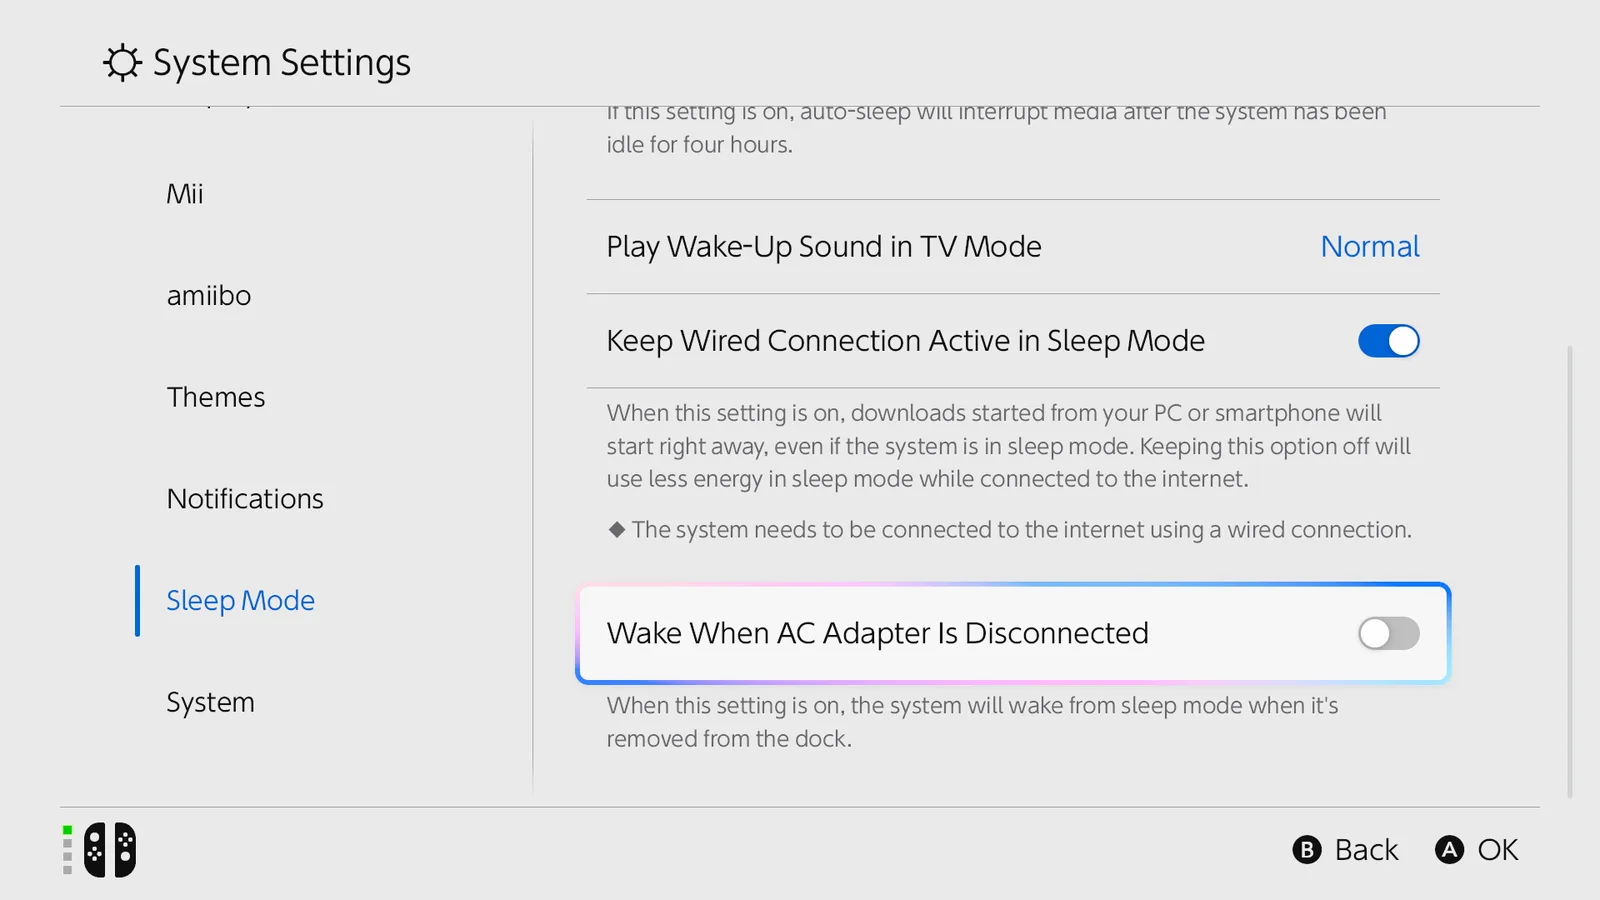
By default the console wakes when you lift it out of the dock. To keep it asleep instead, open System Settings, choose Sleep Mode, and switch off Wake When AC Adapter Is Disconnected.
Turn off Wake When AC Adapter Is Disconnected to keep the console asleep after undocking (Image: Nintendo)
Final Thoughts on Connecting Switch 2 to Your TV
Once you know how to connect Switch 2 to TV, it takes about two minutes: dock power, Ultra High Speed HDMI, Joy-Con 2 off, console in, and the right input on the TV. Most failed setups come down to a reused Switch 1 cable or adapter, or a TV port that does not support 4K60, so check those first and you will rarely need anything else. If you want sharper pictures, spend a minute in the Display settings above, and if your dock ever goes missing, replace it with the official one before anything else.
I'm Iain, and I write the step-by-step guides on GameCuki. I cover game tips and walkthroughs, PC gaming how-tos like settings, performance and troubleshooting, and practical guides for Steam, PlayStation, Xbox and Nintendo Switch. I build each guide from official game and platform documentation, write the steps in plain language and check them against the source before publishing. When a game or platform changes how something works, I update the guide. You can read my full process on our How We Review page.